> ## Documentation Index
> Fetch the complete documentation index at: https://developers.octaviatech.app/llms.txt
> Use this file to discover all available pages before exploring further.
# Quickstart
> Set up your Octavia workspace and go live in minutes.
> Deploy your first Octavia service in minutes
This quickstart walks you through creating an account, activating a service (like **AI CMS**), and generating an API key.
By the end, you’ll have a live workspace, a selected service/plan, and credentials to start building.
Prerequisites: You’ll need an Octavia account. If you don’t
have one yet,{" "}
create a free account
.
## Getting started
Follow the steps below. Each step can include a screenshot — feel free to replace the image placeholders with your own.
### 1) Visit the site and click Sign in
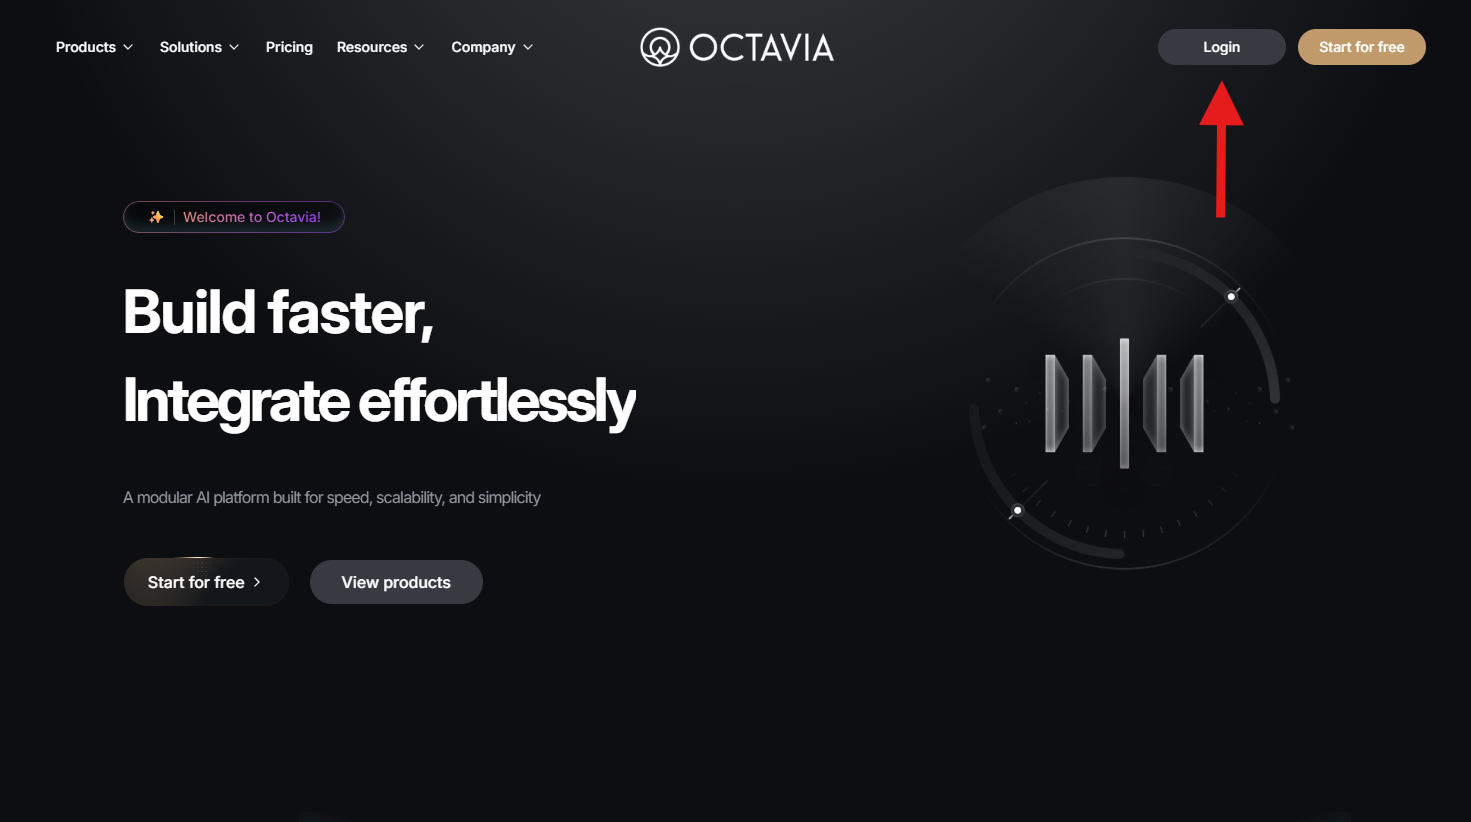 Go to **octaviatech.app** and click **Login**.
***
### 2) Sign in or create an account
If you already have an account, sign in.
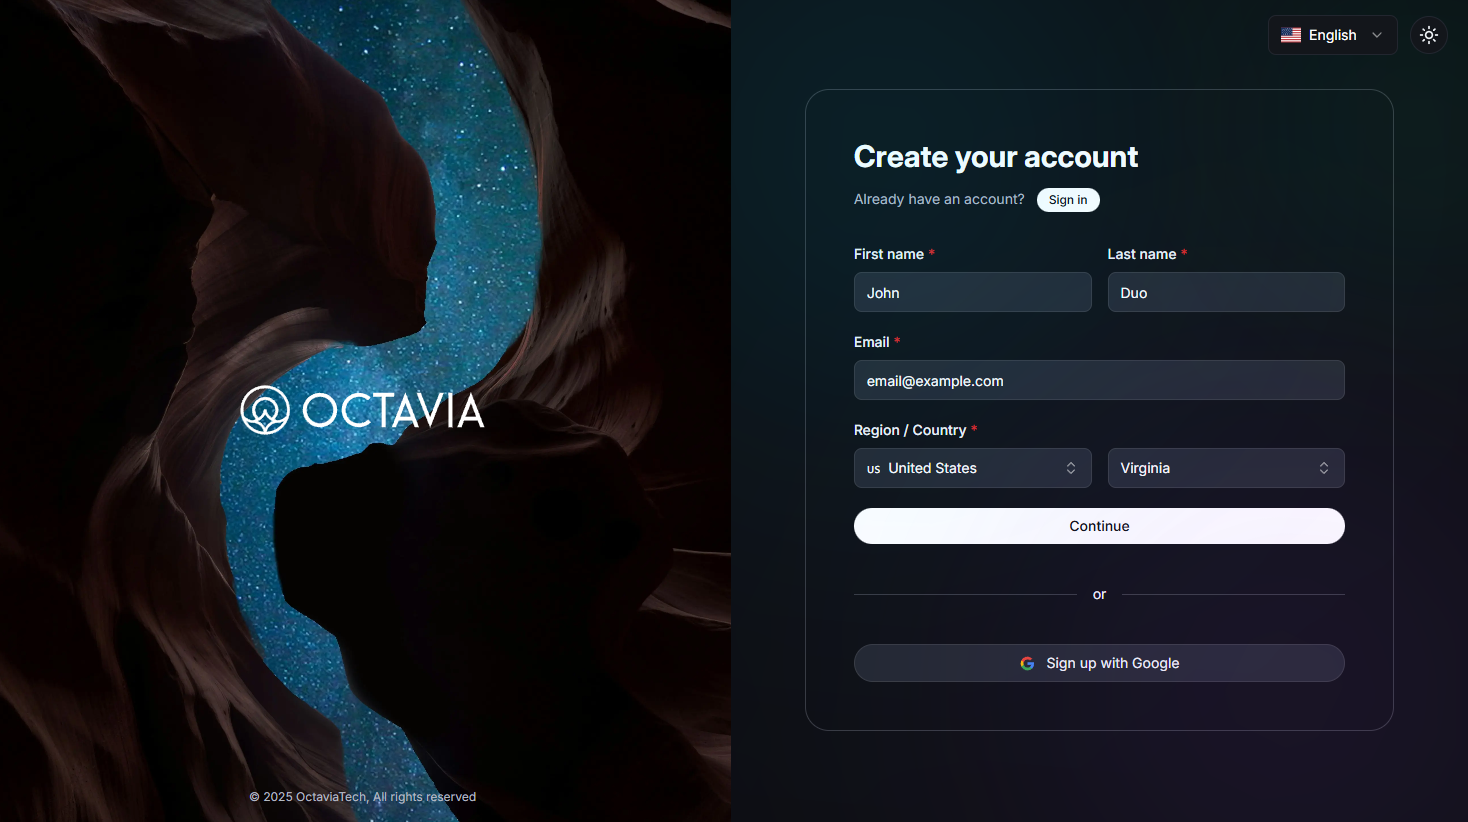
Otherwise, click **Create account** and enter **First name, Last name, Email, Password,** and **Region**, then complete registration.
Go to **octaviatech.app** and click **Login**.
***
### 2) Sign in or create an account
If you already have an account, sign in.
Otherwise, click **Create account** and enter **First name, Last name, Email, Password,** and **Region**, then complete registration.
 ***
### 3) Enter the dashboard and select a team
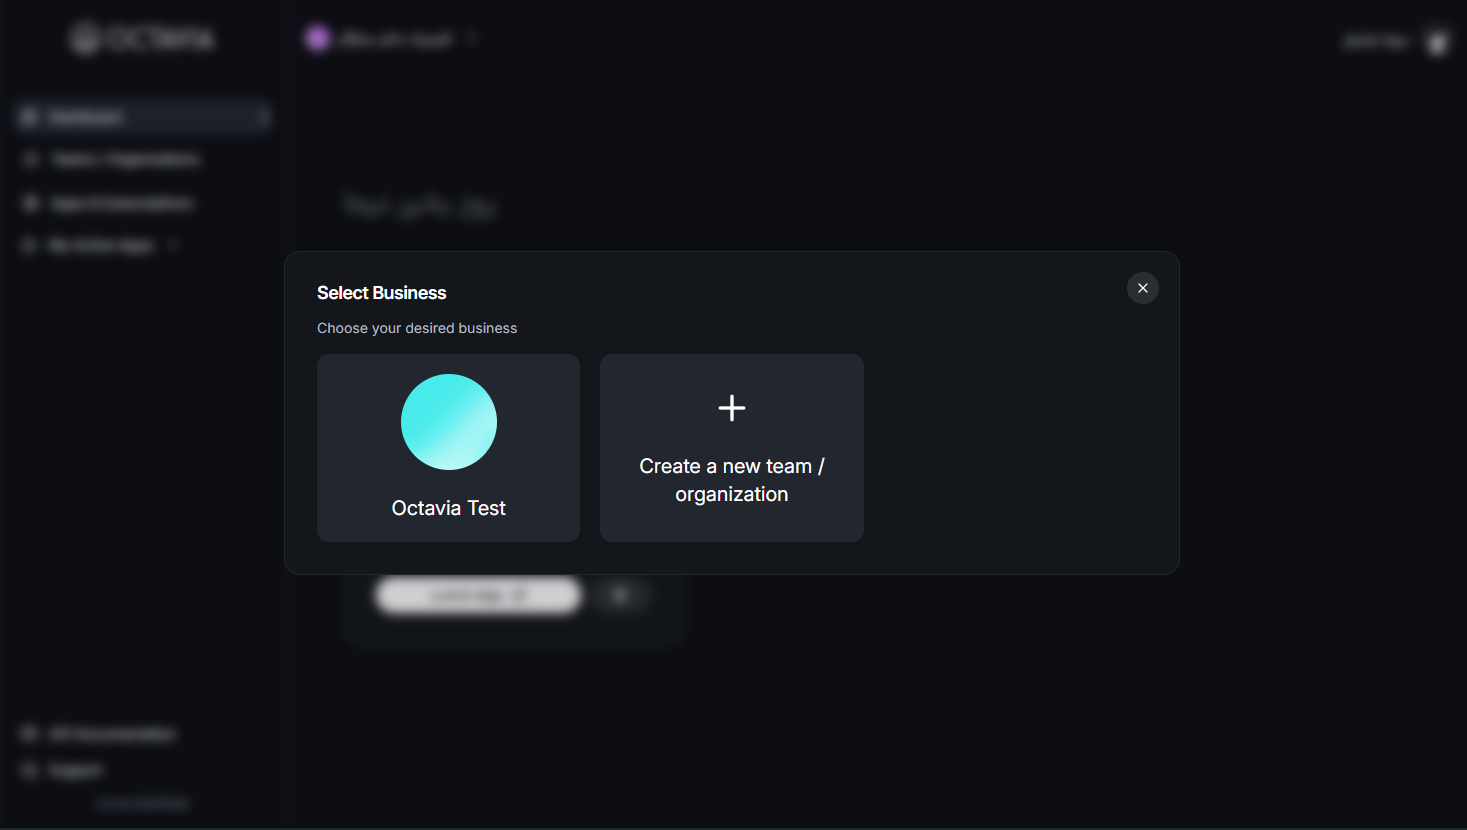
After sign-in, you’ll land in the **Dashboard**. Your **first team** is created automatically using your name.
You can create additional teams later, but to begin quickly, **select the default team** to continue.
***
### 3) Enter the dashboard and select a team
After sign-in, you’ll land in the **Dashboard**. Your **first team** is created automatically using your name.
You can create additional teams later, but to begin quickly, **select the default team** to continue.
 ***
### 4) Open the Octavia Services catalog
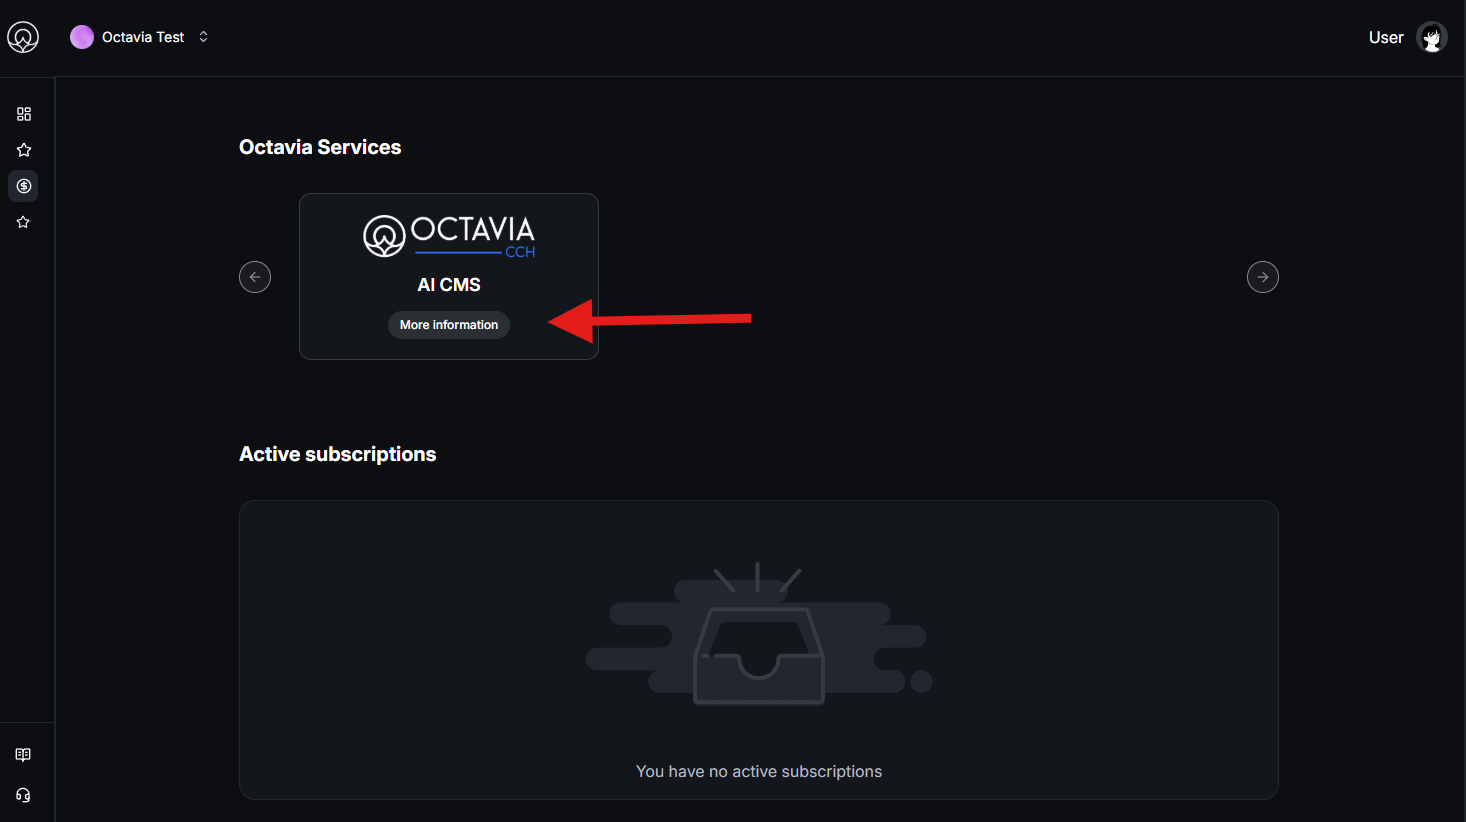
From the dashboard, open **Octavia Services** and pick the product you want (e.g., **AI CMS**, **Auth**, **Payments**, etc.).
***
### 4) Open the Octavia Services catalog
From the dashboard, open **Octavia Services** and pick the product you want (e.g., **AI CMS**, **Auth**, **Payments**, etc.).
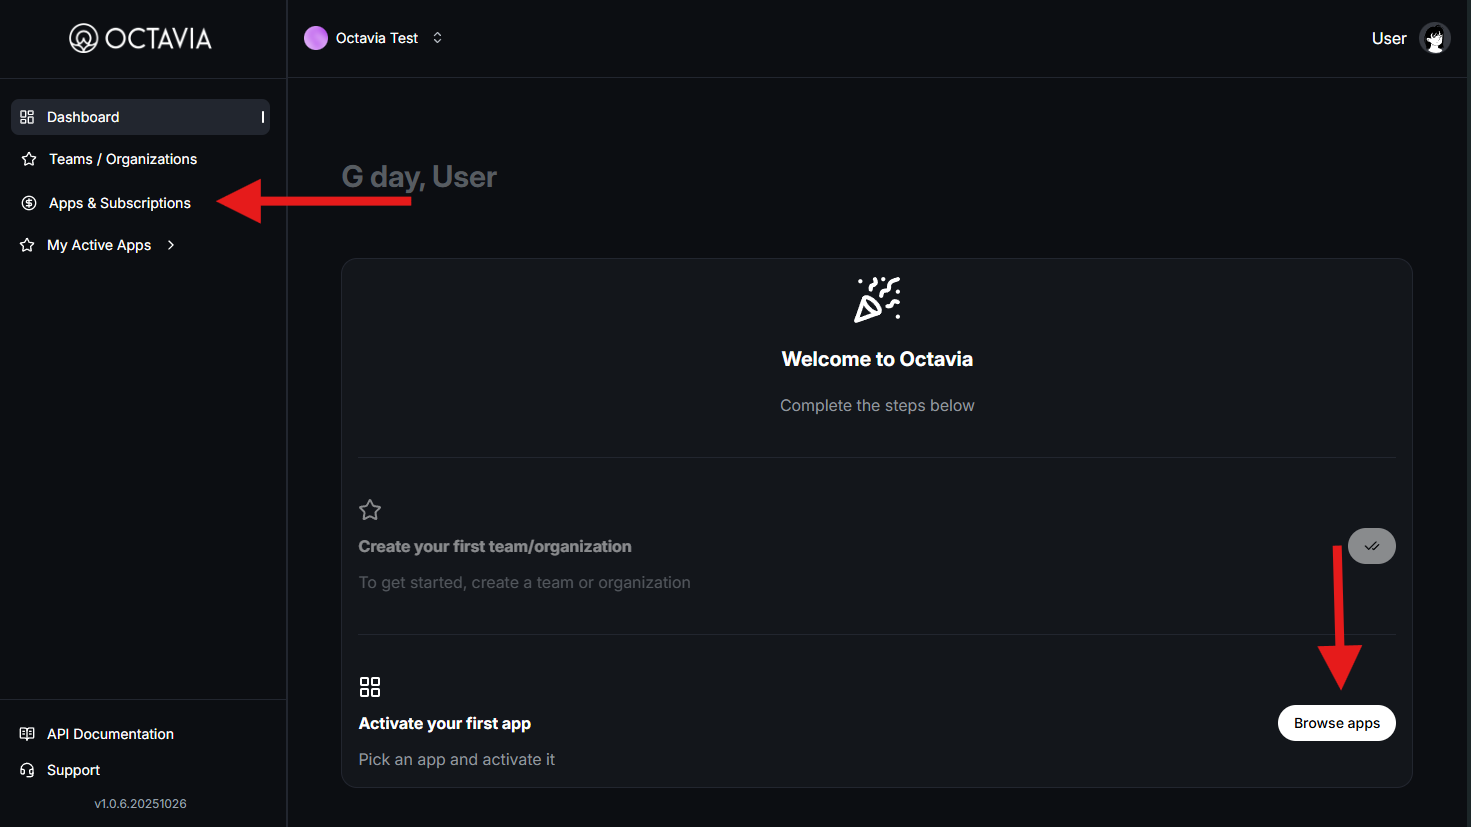 Select your service
 ***
### 5) Choose a plan
Pick a plan that matches your team’s needs. You can start on the **Free** plan and upgrade any time.
***
### 5) Choose a plan
Pick a plan that matches your team’s needs. You can start on the **Free** plan and upgrade any time.
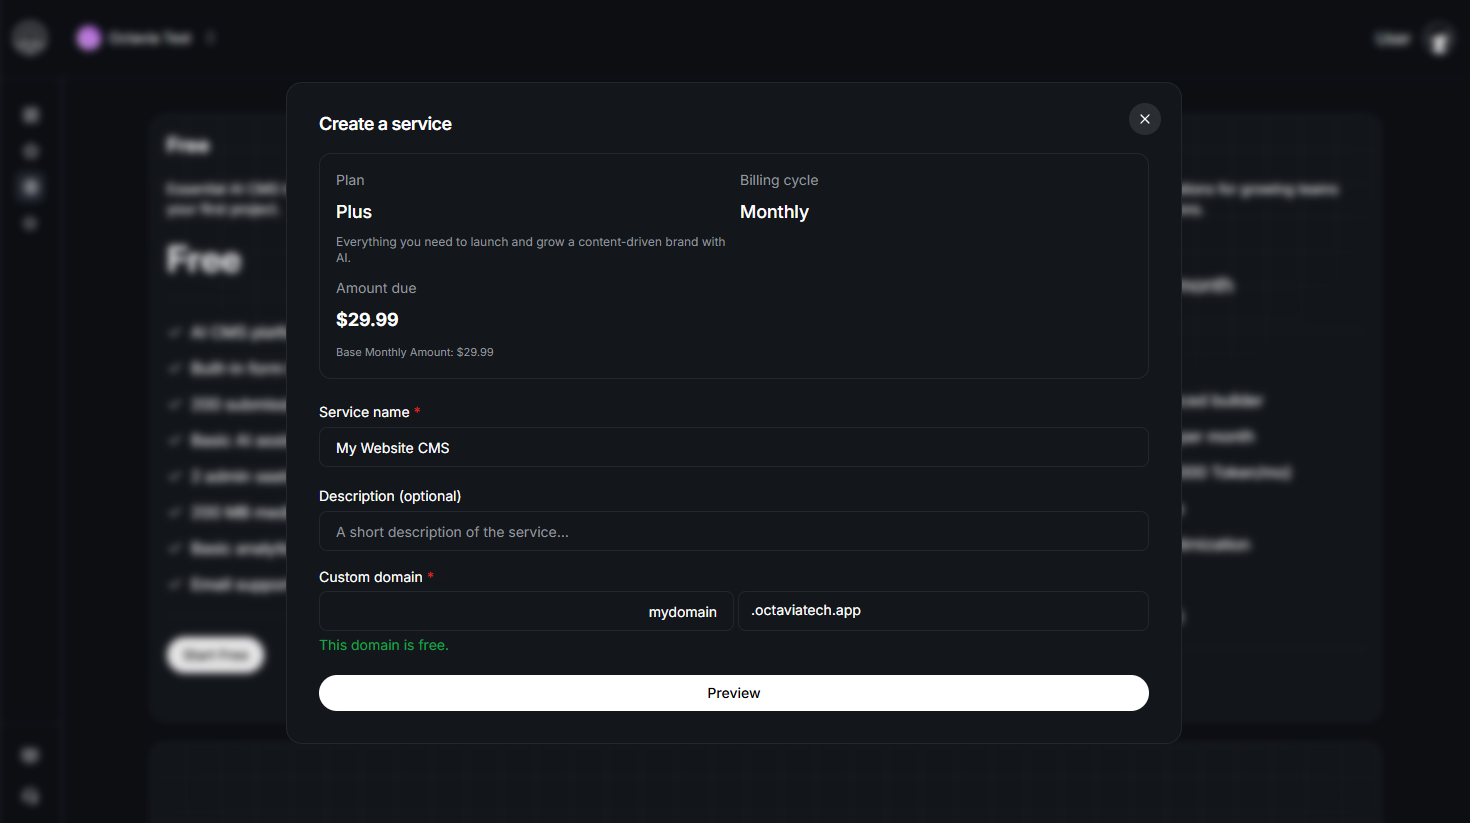 During setup, you can claim a free, hosted subdomain in this format:
```
https://.octaviatech.app
```
***
### 6) Provision complete → Configure and build
During setup, you can claim a free, hosted subdomain in this format:
```
https://.octaviatech.app
```
***
### 6) Provision complete → Configure and build
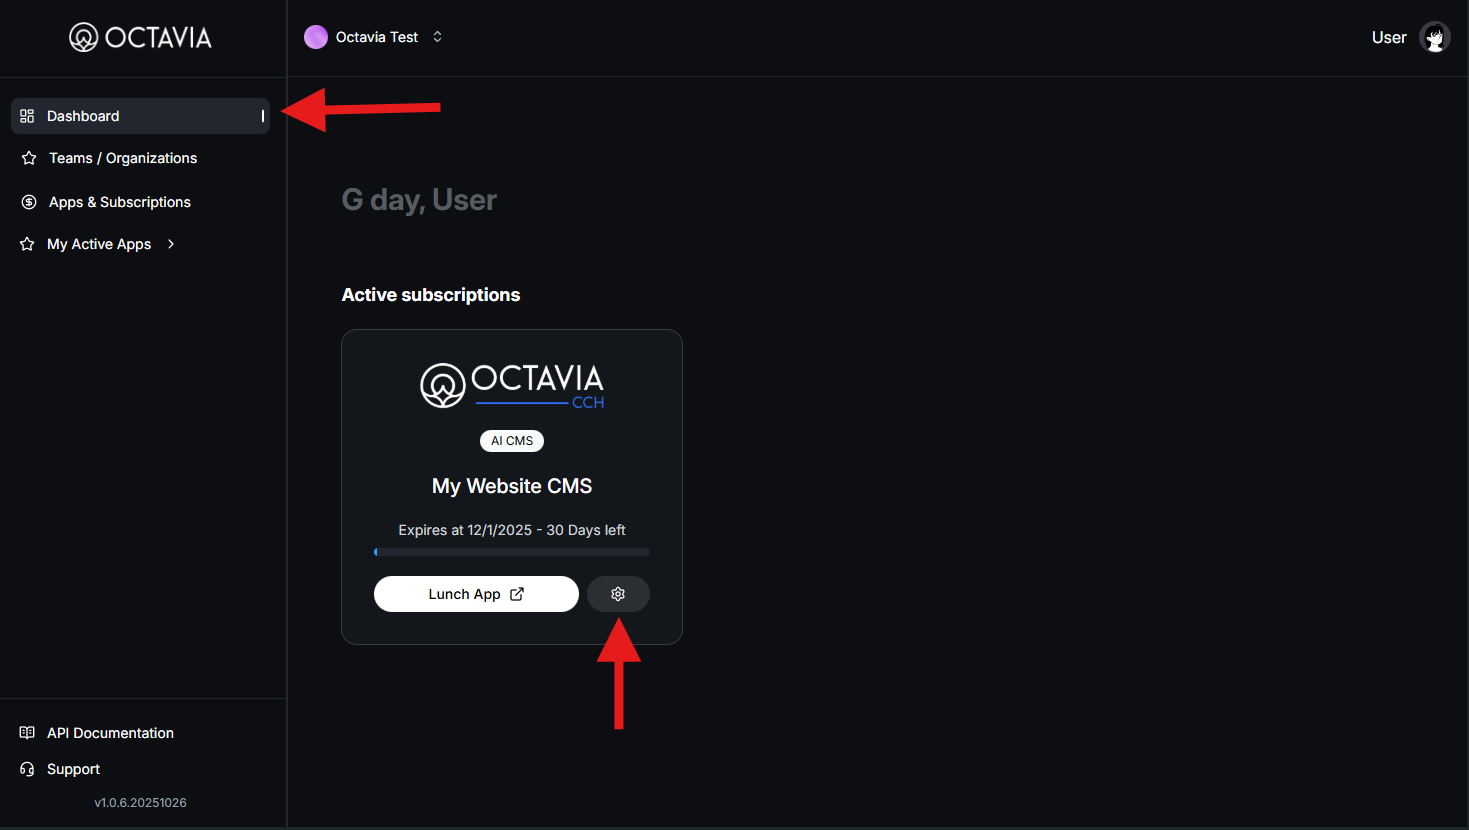 Once the service is created (and billing completed if applicable), you can:
* View **service settings**
* Open the **product console**
* Create **API keys**
* Manage everything from the **left navigation**
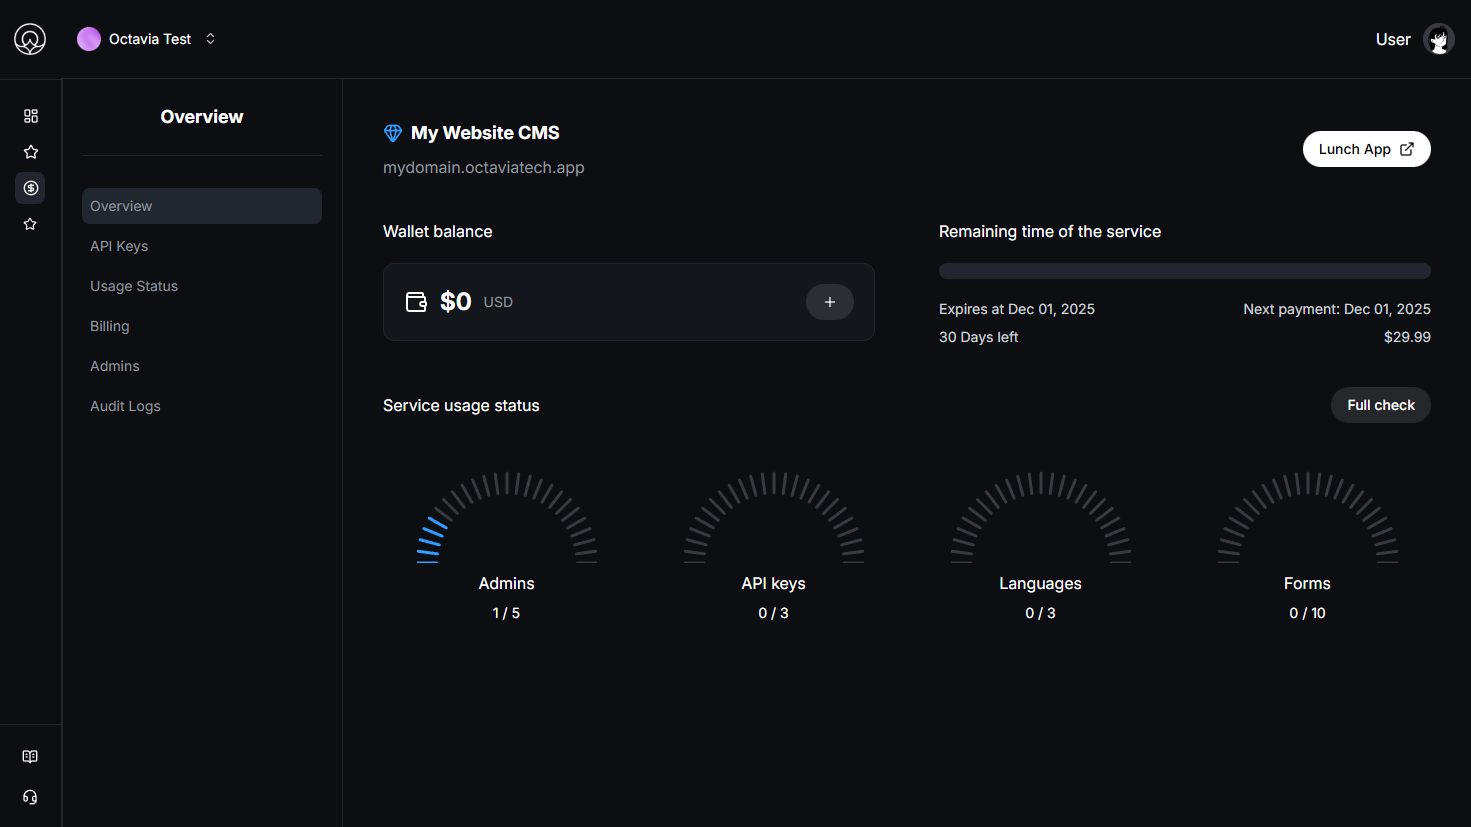
Once the service is created (and billing completed if applicable), you can:
* View **service settings**
* Open the **product console**
* Create **API keys**
* Manage everything from the **left navigation**
 ***
## Troubleshooting
Refresh the dashboard or re-open the team switcher. If the default team was renamed or removed, create a new one and select it before continuing.
{" "}
Check your billing status if you chose a paid plan. If payment succeeded,
refresh the dashboard; provisioning usually completes within seconds.
{" "}
Ensure the
***
## Troubleshooting
Refresh the dashboard or re-open the team switcher. If the default team was renamed or removed, create a new one and select it before continuing.
{" "}
Check your billing status if you chose a paid plan. If payment succeeded,
refresh the dashboard; provisioning usually completes within seconds.
{" "}
Ensure the x-api-key header is present on every request and that
you’re using a valid, active key from the dashboard.
The limit is 50 req/s per IP. Implement client-side queuing and exponential backoff, or distribute requests across workers.